
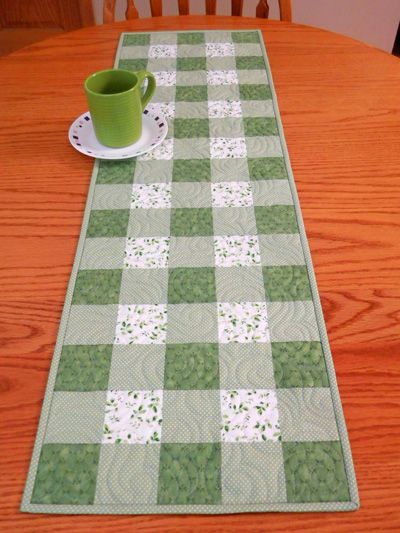
A quilted table runner is a fantastic project for beginners to hone their quilting skills.
Not only does it offer a practical purpose, but it also provides an opportunity to explore different fabric combinations and quilting techniques.
In this article, we will introduce a simple quilted table runner pattern suitable for beginners, along with a step-by-step guide to help you create your own beautiful and functional piece.
Introduction to Quilted Table Runners:
Quilted table runners are versatile and can add a touch of elegance to any dining table, coffee table, or sideboard. They are also an excellent way to practice basic quilting techniques before moving on to larger projects like quilts. With a few fabric choices, basic sewing skills, and a bit of patience, you can create a stunning table runner that reflects your personal style.
Materials Needed:
Before we begin, let’s gather the materials you will need to create your own quilted table runner:
- Fabric:
- ½ yard of fabric for the table runner top
- ½ yard of fabric for the backing
- ¼ yard of fabric for the binding
- Fabric scraps for appliqué (optional)
- Batting: ½ yard of low-loft cotton batting
- Ruler and Rotary Cutter: Essential tools for accurately cutting fabric pieces.
- Sewing Machine: A basic sewing machine will suffice.
- Thread: Select a thread that complements the colors of your fabric.
- Quilting Pins or Clips: To hold fabric pieces together during sewing.
- Iron and Ironing Board: Essential for pressing seams and achieving crisp, flat quilt blocks.
Quilted Table Runner Pattern:
Cutting Instructions:
Before you begin, wash, dry, and press your fabrics to prevent shrinking after your table runner is completed. Then, follow these cutting instructions:
- Table Runner Top:
- Cut 2 strips measuring 5½” x 36½”.
- Cut 1 strip measuring 5½” x 18½”.
- Backing:
- Cut 1 piece measuring 13″ x 38″.
- Binding:
- Cut 4 strips measuring 2½” x WOF (Width of Fabric).
Piecing the Table Runner:
Follow these steps to piece your quilted table runner:
- Assemble the Table Runner Top:
- Sew the 5½” x 36½” strips to the top and bottom of the 5½” x 18½” strip. Press seams open.
- Create the Quilt Sandwich:
- Lay the backing fabric on a flat surface, wrong side facing up.
- Place the batting on top of the backing.
- Finally, place the table runner top on top of the batting, right side facing up. Ensure all layers are smooth and wrinkle-free.
- Quilting:
- Use quilting pins or clips to secure the layers together.
- Quilt as desired. For beginners, straight-line quilting or simple geometric patterns are recommended. Quilt along the seams, around the edges of the strips, or in a cross-hatch pattern.
- Start quilting from the center and work your way out to prevent puckering.
- Trim Excess:
- After quilting, trim the excess batting and backing so that all three layers are flush with the edges of the table runner top.
- Adding the Binding:
- Join the binding strips together by sewing them diagonally from corner to corner. Trim the excess fabric, leaving a ¼” seam allowance.
- Fold the binding in half lengthwise, wrong sides together, and press.
- Starting in the middle of one side of the table runner, align the raw edges of the binding with the raw edges of the table runner. Leave a 6″ tail before you start sewing.
- Sew the binding to the table runner top using a ¼” seam allowance. Stop sewing ¼” from the corner.
- Pivot the table runner and continue sewing from the corner. Repeat this process for all corners.
- When you reach the starting point, trim the ends of the binding strips, leaving a 6″ tail.
- Fold the ends of the binding strips to form a diagonal fold, then fold over the binding, encasing the raw edges.
- Finally, fold the binding over the raw edges of the table runner and stitch it down by hand or machine.
- Finishing:
- After the binding is sewn down, press the table runner to ensure all the seams are flat and crisp.
- Your quilted table runner is now ready to adorn your table!
Optional Embellishments:
For those feeling a bit more adventurous, consider adding appliqué shapes to your table runner:
- Create Appliqué Shapes:
- Using fabric scraps, cut out desired shapes. Popular choices include hearts, leaves, or stars.
- Fuse the shapes to the table runner top using fusible webbing.
- Stitch the Appliqué:
- Sew around the edges of the appliqué shapes using a straight or zigzag stitch.
Conclusion:
Creating a quilted table runner is an excellent way for beginners to start their quilting journey. With this simple pattern and step-by-step guide, you can create a beautiful and functional piece that will add a touch of charm to any table. Experiment with different fabric combinations and quilting techniques to make your table runner uniquely yours. Enjoy the process and happy quilting!