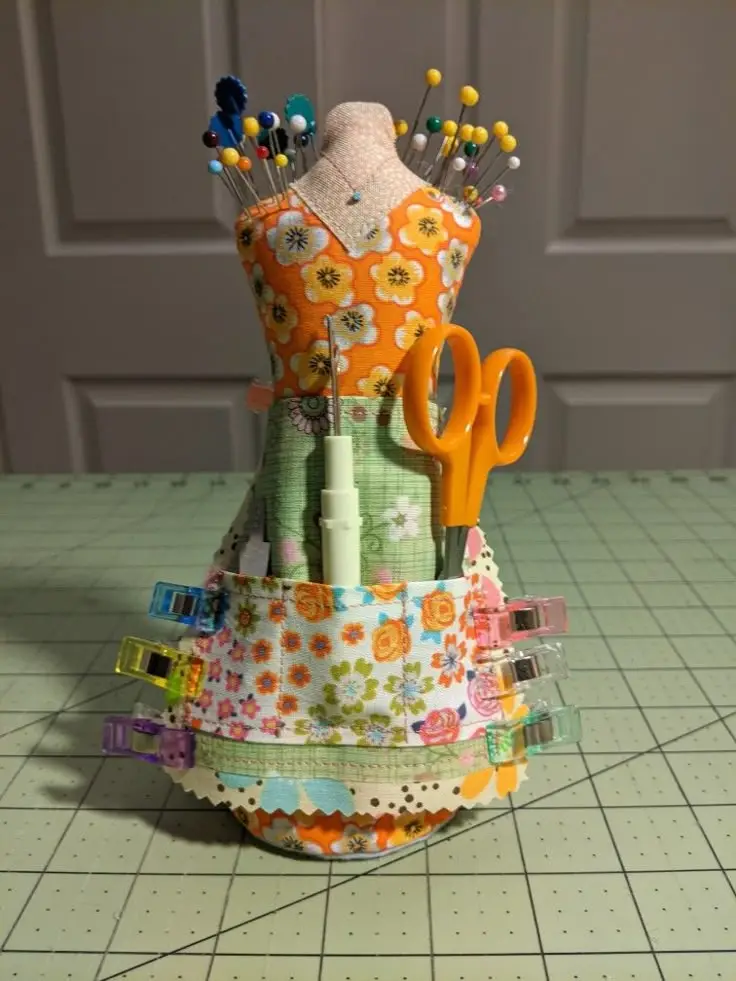
This project is perfect for those starting out and want to create a fun, practical piece full of personality.
The idea is to make a fabric doll with colorful patchwork details using basic sewing techniques.
You can use fabric scraps from old clothes, T-shirts, or decorative fabrics. Let’s get started!

Materials:
Colorful cotton or patchwork fabric (for the doll and the pouch)
More durable fabric for the body or base of the doll
Felt or soft fabric for finishing touches (optional)
Sewing thread (matching the fabrics)
Sewing needle or sewing machine
Scissors
Fabric glue (optional, to mark details before sewing)
Ribbons or bows (optional, for hair or decorative details)
Small patchwork or scrap fabric for the pouch (use different fabrics for a fun look)
Step-by-step Instructions:
1. Prepare the Pattern
Create a simple paper pattern of a doll with the following measurements:
Body: approximately 8 inches (20cm) tall
Head: about 3 inches (8cm) in diameter
Pouch: 4 inches (10cm) tall x 3 inches (8cm) wide
Arms and legs: about 4 inches (10cm) each
2. Cut the Fabrics
Cut two pieces of durable fabric for the doll’s body.
Cut patchwork pieces for the clothing, pouch, and details:
For the dress: scraps of 4 inches x 4 inches, to assemble patchwork patterns.
For the pouch: rectangle of 4 inches x 3 inches.
For hair or other decorations: small scraps of 1 inch x 1 inch.
3. Create the Patchwork
Sew the fabric scraps in rows, joining patches to form the doll’s clothing.
Mix colors and patterns randomly or in a chosen order.
For the pouch, sew small fabric pieces together to create a colorful design, or use a single large patch.
4. Sew the Doll
Join the two body pieces with the right sides facing each other.
Sew around, leaving an opening for stuffing.
Turn the doll right side out and stuff with cotton or soft filling.
Sew the opening closed with invisible stitches.
5. Add Details
Sew or glue hair onto the head using scrap fabrics or ribbons.
Attach the pouch to the front of the doll’s clothing or body.
Add extra details like bows, buttons, or stitched eyes for expression.
6. Finish the Doll
Secure the top and edges with reinforced stitches.
Add a hair ribbon or bow if desired.
Additional Tips:
Use bright, cheerful colors for a more playful look.
Mix different textures of fabric for visual interest.
Be creative with decorations: embroidery, buttons, ribbons, etc.
