
Patchwork is a charming technique that combines creativity and the reuse of fabrics. In this tutorial, you will learn how to make an artistic cushion with a cat’s face, using geometric cutouts, appliqué, and decorative quilting.
Materials Needed
• Scraps of various fabrics (cotton tricoline is ideal)
• Base fabric (to structure the front block)
• Fabric for the back (40×40 cm or 45×45 cm)
• Acrylic batting (R1 or R2)
• Fusible interfacing (for application)
• Cat face template (drawn or printed)
• Sewing thread (various colors or neutral)
• Quilting thread (optional)
• Scissors or rotary cutter
• Ruler and cutting mat
• Iron
• Sewing machine
• Pins
• Cushion stuffing or insert
Suggested Measurements
• Final cushion size: 40×40 cm
• Front block (patchwork): 42×42 cm (including seam allowance)
Step 1: Creating the Cat Template
1. Draw or print a stylized cat face template (divided into parts: eyes, nose, muzzle, ears and (background).
2. Separate each part as if it were a “puzzle”.
3. Number the pieces to facilitate assembly.
Tip: Simplify the design into geometric blocks to make sewing easier.
Step 2: Choosing and Cutting the Fabrics
1. Choose contrasting and colorful fabrics to create a vibrant effect.
2. Cut the patterns with a 0.75 cm seam allowance.
3. For the eyes and nose, prefer plain fabrics that highlight the design.
4. For the background and face, mix prints and coordinated colors.
Step 3: Assembling the Front Patchwork
You can use two techniques:
Technique 1: Traditional Sewing (Patchwork Piecing)
• Join the geometric pieces by sewing right sides together.
• Iron the seams at each step.
• Assemble the smaller parts first (eyes, snout) and then join them to the rest.
Technique 2: Application with Fusible Interfacing (Easier for beginners)
• Fusible interfacing pieces onto a base fabric.
• Iron to fix.
• Sew around with a zigzag stitch or decorative blanket stitch.
Step 4: Quilting (Textured Effect)
1. Place the batting behind the front panel.
2. Make decorative stitches following the contour of the pieces.
3. You can do:
– Free-motion quilting (organic movement)
– Straight lines
– Outline of the shapes
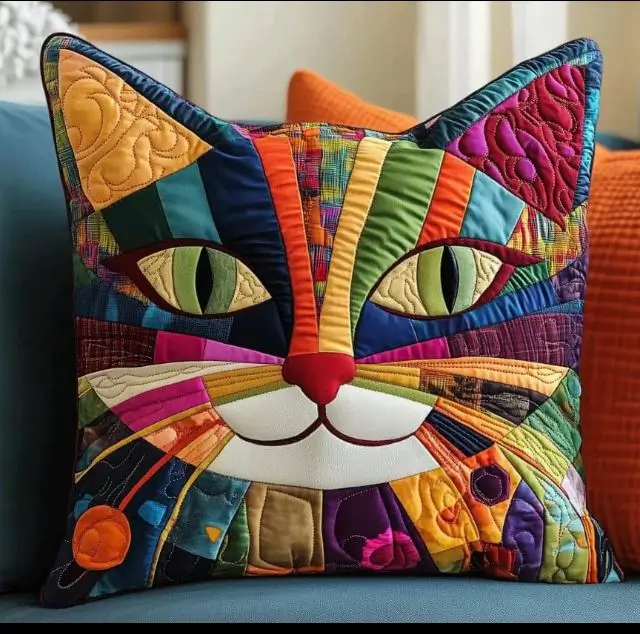
This step gives the quilted relief that appears in the image.
Step 5: Assembling the Cushion
1. Cut the backing fabric to the same size as the front panel.
2. Place right sides together.
3. Sew all around, leaving a 10 cm opening.
4. Turn right side out.
5. Add the stuffing or filling.
6. Close the opening with an invisible hand stitch.
Alternative: add a zipper to the back for a removable cover.
Tips for a Professional Result
• Use a harmonious color palette.
• Mix plain and patterned fabrics.
• Iron at all stages.
• Use contrasting quilting thread to highlight the designs.
• Test the composition before sewing.
Final Result:
You will have an artistic cushion, full of personality, with a quilted texture and a modern design. Besides decorating sofas and armchairs, it can be an excellent handmade product for sale.