
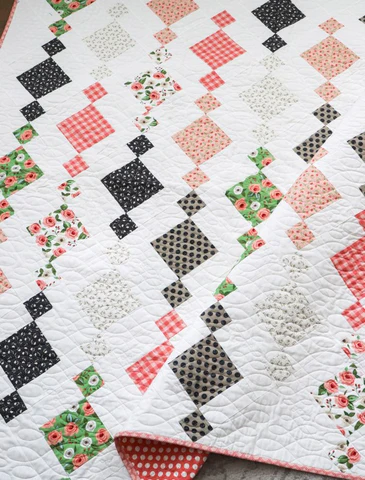
Quilting is an art form that has been cherished for generations, and creating your own quilt can be a deeply rewarding experience. If you’re new to quilting and looking for a project to start with, the Chandelier Quilt pattern is an excellent choice.
This beginner-friendly pattern features simple piecing techniques and a stunning design that will impress both beginners and seasoned quilters alike.
In this comprehensive guide, we’ll explore everything you need to know to create your own Chandelier Quilt, from selecting fabrics to piecing the blocks and assembling the quilt top.
Getting Started:
Before diving into your Chandelier Quilt project, it’s essential to gather all the necessary materials. Here’s what you’ll need:
- Fabric: Choose a variety of fabrics for your quilt top, including a background fabric and fabrics for the chandelier blocks. Consider using a mix of solids and prints to add visual interest to your quilt.
- Batting: Select a batting that suits your preferences for warmth and weight. Cotton batting is a popular choice for quilts.
- Backing Fabric: Choose a fabric for the back of your quilt that complements the colors and patterns in your quilt top.
- Thread: Use high-quality thread that coordinates with your fabric choices.
- Ruler and Rotary Cutter: Essential tools for accurately cutting fabric pieces.
- Sewing Machine: While you can hand-piece your quilt, using a sewing machine will speed up the process.
- Quilting Pins or Clips: To hold fabric pieces together during sewing.
- Iron and Ironing Board: Essential for pressing seams and achieving crisp, flat quilt blocks.

Choosing Fabrics:
When selecting fabrics for your Chandelier Quilt, consider the overall aesthetic you want to achieve. Traditional quilts often feature a mix of light, medium, and dark fabrics, while modern quilts may incorporate bold colors and graphic prints. You can also experiment with different fabric textures, such as cotton, linen, or even silk, to add dimension to your quilt.
For the chandelier blocks, choose fabrics that complement each other and contrast with the background fabric. You can opt for a monochromatic color scheme or mix and match different colors for a more eclectic look.
Piecing the Blocks:
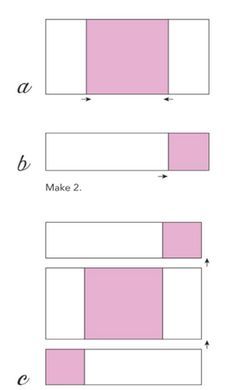
The Chandelier Quilt pattern features simple piecing techniques that are perfect for beginners. Each chandelier block consists of four half-square triangles (HSTs) arranged in a square. Here’s how to piece the blocks:
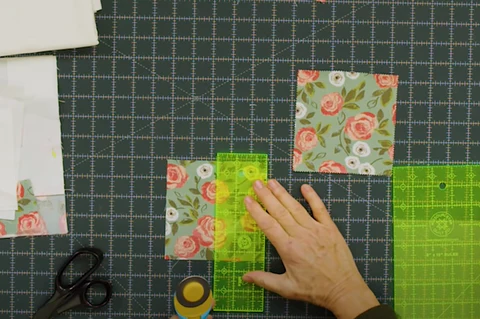
- Cutting Fabric:
- Begin by cutting squares of fabric for the chandelier blocks and background fabric according to the pattern instructions.
- Use a ruler and rotary cutter to ensure accurate measurements.
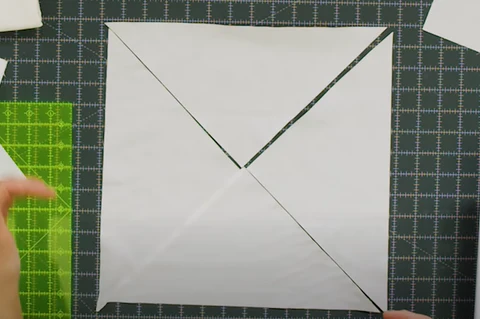
- Making Half-Square Triangles (HSTs):
- Pair each chandelier fabric square with a background fabric square, right sides together.
- Draw a diagonal line from corner to corner on the wrong side of each background fabric square.
- Sew a ¼-inch seam on both sides of the drawn line.
- Cut along the drawn line to create two HST units.
- Press the seams open to reduce bulk and ensure flat blocks.
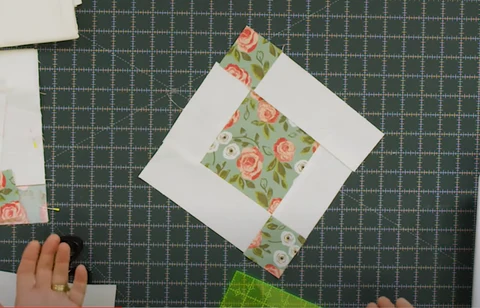
- Assembling the Blocks:
- Arrange the HST units into a square, alternating the fabric colors to create the chandelier design.
- Sew the units together in rows, then sew the rows together to complete the block.
- Press the seams open to ensure the block lies flat.
- Making Multiple Blocks:
- Repeat the process to create multiple chandelier blocks according to the quilt pattern’s specifications.
Assembling the Quilt Top:
Once you’ve pieced all the chandelier blocks, it’s time to assemble the quilt top. Arrange the blocks in rows, alternating the orientation of the chandelier design to create visual interest. Sew the blocks together, pressing the seams open as you go. Add borders to the quilt if desired, then trim any excess fabric to square up the edges.
Quilting and Finishing:
With the quilt top complete, it’s time to quilt and finish your Chandelier Quilt. Layer the quilt top with batting and backing fabric, then baste the layers together using quilting pins or clips.
Quilt as desired, either by hand or using a sewing machine. Popular quilting techniques for the Chandelier Quilt include straight-line quilting, free-motion quilting, or echoing the chandelier design.
After quilting, trim any excess batting and backing fabric, then add binding to the edges of the quilt to finish it off. Hand-stitch the binding to the back of the quilt for a clean, professional finish.
Conclusion:
Creating a Chandelier Quilt is a rewarding project that’s perfect for beginners. With its simple piecing techniques and stunning design, this quilt pattern is sure to impress.
Whether you’re drawn to traditional or modern quilting styles, you can customize your Chandelier Quilt to reflect your unique aesthetic. So gather your materials, fire up your sewing machine, and embark on your quilting journey today!