
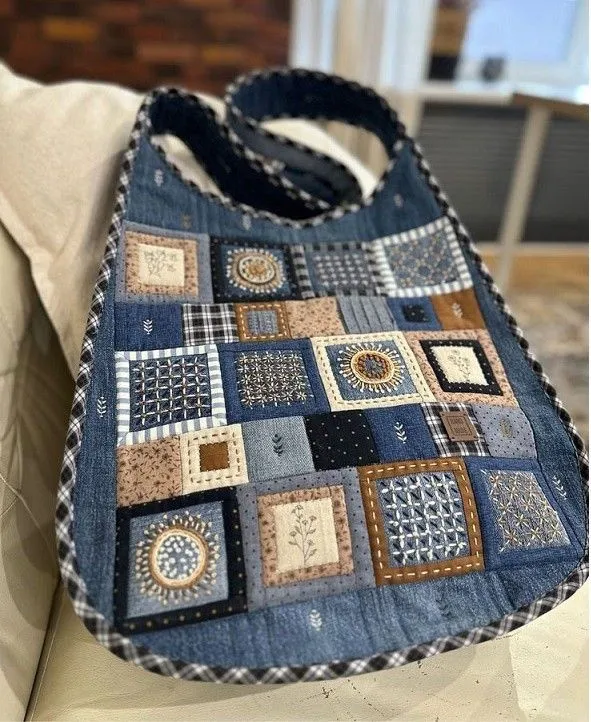
The patchwork denim bag is a unique piece that combines practicality with a handmade look full of personality.
Each patchwork is an opportunity to reuse jeans of different shades and create a charming patchwork effect.
Below, I present a detailed step-by-step guide with measurements, cuts and suggestions for you to make your own patchwork denim bag, with a beautiful and durable finish.
Materials:
Jean scraps (assorted, preferably in light and dark shades)
Lining fabric (optional)
Sturdy sewing thread in denim color or neutral
Sewing machine or needle and thread for hand sewing
Scissors
Ruler or tape measure
Pins
Fabric glue (optional)
Zipper, button or magnet closure (optional)
Suggested measurements:
Front panel: 30cm wide x 25cm high
Back panel: 30cm wide x 25cm high
Bag bottom: 10cm deep (for a medium bag)
Handle: 60cm long x 3cm wide (folded in half to make 1.5cm wide)
Top hem or trim: 2cm seam allowance
Step by step with measurements:
1. Cut the scraps
Cut squares or rectangles measuring 5cm to 7cm to create the patchwork.
Make about 25-30 scraps to assemble the front and back (considering variations in size and layout).
2. Assembling the front and back panels
Assemble the patchwork composition randomly or in an organized manner.
Sew the scraps side by side, forming a single piece measuring 30cm x 25cm for the front and back.
3. Assembling the bottom
For the bottom of the bag, you can use a more resistant scrap or a piece of cotton fabric measuring 10cm deep x 30cm wide.
Sew to the bottom of the front and back panels.
4. Constructing the top edge
Use a piqué or printed cotton fabric (plaid, for example) measuring 35cm x 5cm.
Fold it in half (lengthwise) to make a finishing flap measuring approximately 2.5cm thick.
Sew to the top of the bag, reinforcing the seam.
5. Making the handle
Use a 60cm x 3cm strip of denim, fold it in half widthwise to make it about 1.5cm wide.
Sew the edges of the strip to reinforce it.
Attach the ends of the handle to the top of the bag, on the side, with reinforced stitches.
6. Final assembly
Sew the sides of the front panel to the back panel, also joining the bottom.
Sew the finishing flap to the top, forming the mouth of the bag.
Optional: add a zipper or button closure to the top.
Final suggestions:
You can add extra details such as embroidery, appliqués or decorative stitching.
For greater durability, use heavy-duty thread and sew with double stitches in the areas of greatest stress.